With the release of Silverlight 2.0 also came the functionality of Deep Zoom. Deep Zoom optimizes the viewing of large images in a smooth manner by partitioning an image into tiles and levels of resolution of the original image. Using this method allows for the browser to download a lower resolution image for a faster download speed and then only grab the higher resolution image if the user zooms in. When the user does zoom in the tile that represents that section of the higher resolution image is download to the browser again saving the viewer download time and enhancing the user experience.
In order to begin working with Deep Zoom the first thing we need to do is prepare an image for Deep Zoom by creating tiles out of the image of different resolutions. This would be a bit cumbersome to do by hand so luckily Microsoft has provided us with the Deep Zoom Composer which you can download for free. This allows us to create the Deep Zoom images and even allows us to create a collage of image in Deep Zoom. We will be doing the latter, using the numerous amount of photos that I took while traveling through Europe for the month of September.
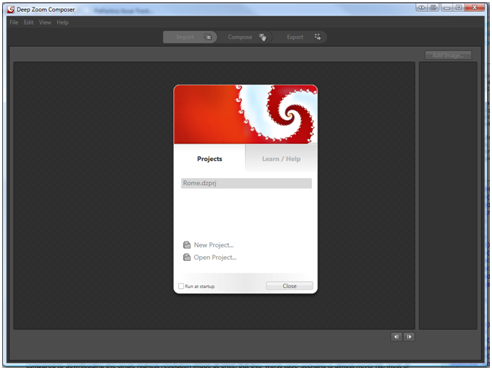
The first thing we need to do is create a new project in Deep Zoom Composer. Do this by running the Deep Zoom Composer and selecting new project. After doing this you will see three tabs along the top – Import, Compose, and Export. If you are not already on the Import tab, select it, and then we need to add the images that we want to work with. In my case I will be adding in all my pictures from Rome. Click the Add Image… button on the right and select the images that you want to add. Remember that you can select multiple images at once to get your images imported in faster.
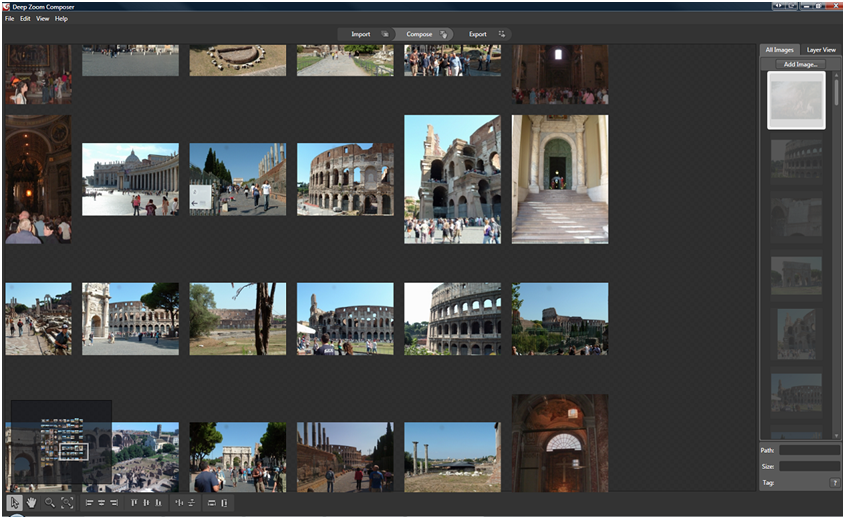
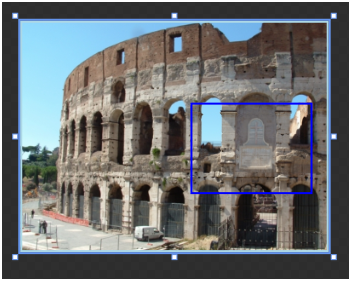
Once the images are imported we then switch over to the Compose tab. The tab allows you to create how the final image will look in your Silverlight Application. Select your imported images from the side and place them on the canvas how you would like them to appear. You can zoom in and out on the canvas and place your photos at different depths, even embedding them within each other. For instance I have an image of the Coliseum from the distance with a sign that is on the side of it. I then have a closer image of that sign as another picture. The Deep Zoom composer allows me to embed the more detailed image of the sign into the image of the Coliseum.
In the composer you also have the ability to associate tags with the images. I have associated various tags with all my images. Through the composer you can only apply one string as a tag, so I have used this field to enter multiple "tags" separated by commas. In a future tutorial I will demonstrate how to create a tag filter to filter down images shown in the MultiScaleImage.
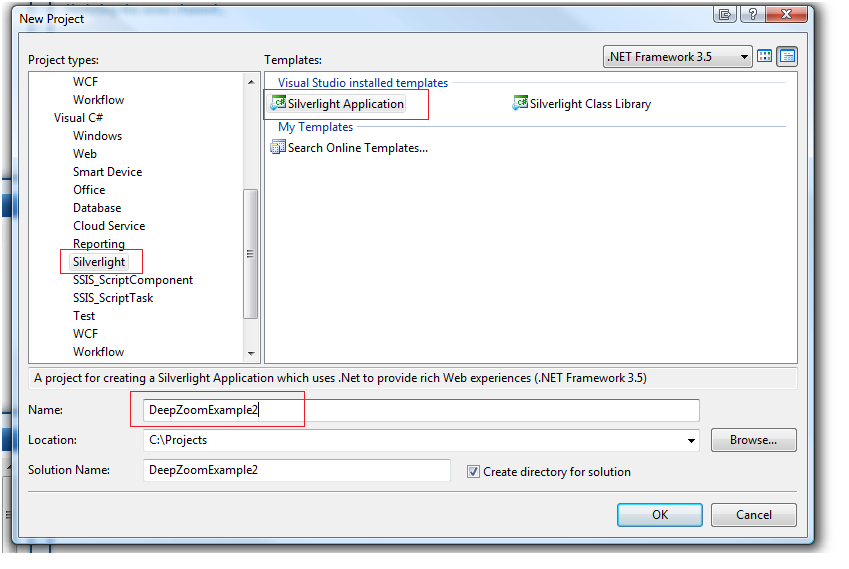
Once we have exported the images from Deep Zoom Composer it is now time to get our hands dirty in Visual Studio 2008. In order to work with Silverlight 2.0 applications you are going to need 3 things, Visual Studio 2008 SP1, the Silverlight SDK, and the Silverlight tools for Visual Studio 2008. Fire up vs2008, go to File->New->Project and under Visual C# (or if you prefer you can select VB) select Silverlight. Then select Silverlight Application on the right, name your solution, and select where you want to save it.
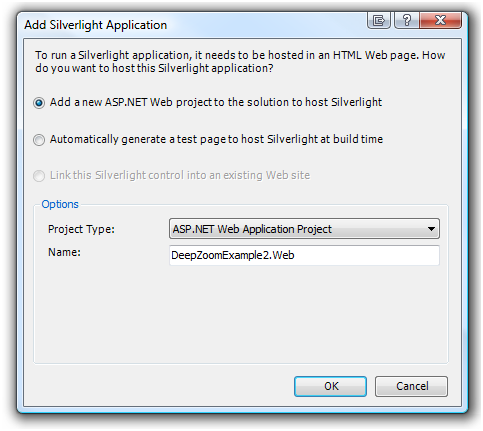
Next a window will appear that will ask you if you want to add a new ASP.NET web project to the solution or generate a test page at build time. Every Silverlight application needs to be hosted inside a web application so we will let Visual Studio add a project to our solution for this purpose.
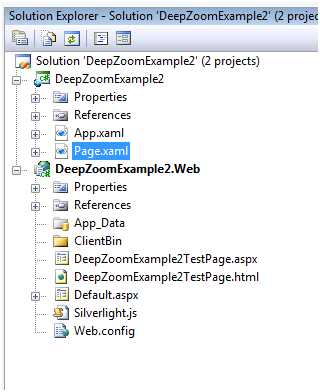
If you now look in the Solution Explorer you will see that we have an empty Silverlight Application called DeepZoomExample2 and a ASP.NET web project called DeepZoomExample2.Web. The web project has two pages that were created for us, an aspx page and a html page that hosts our Silverlight Application.
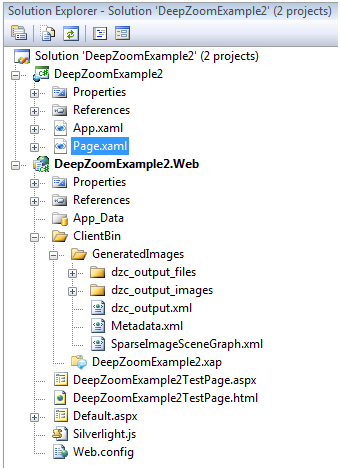
Next we need to add our exported images to the web project. Add a new folder under the ClientBin folder on the Web Project and call it GeneratedImages. The ClientBin folder is where the compiled .xap file from your Silverlight will live so this is the easiest place to put our exported files. Now go into your exported folder from the Deep Zoom Composer and open up the generated images folder and copy the dzc_output_files folder, and the dzc_output_images folder along with the three files, dzc_output.xml, Metadata.xml, SparseImageSceneGraph.xml into the new GeneratedImages folder that you created in your web project. If you used a lot of images this may take some time to copy. Your Solution Explorer should now look like the following image.
Now it's time to start writing some code. First we add a MultiScaleImage to the Page.xaml file. The Source property will be directed at the dzc_output.zml files that we copied into our GeneratedImages folder.
<Grid
x:Name="LayoutRoot"
Background="White">
<MultiScaleImage
x:Name="msi"
ViewportWidth="1.0"
Source="/GeneratedImages/dzc_output.xml" />
</Grid>
This is all we need to do to get the basic images on the screen, but that isn't very exciting so lets wire up some zooming using the mouse button. In the Page.xaml.cs file we need to add a few variables to store some information:
//This variable is used to know if the user has just click the left button or has clicked and dragged
private
bool mouseIsDragging = false;
//Indicates if left mouse button is down
private
bool mouseButtonPressed = false;
//Starting Point of the Drag
private
Point dragOffset;
//Get Current ViewPort position of MSI
private
Point currentPosition;
//Last Position of Mouse
private
Point lastMousePos = new
Point();
public
double ZoomFactor
{
get; set;
}
We then have three mouse events that we need to handle, LeftMouseButton down, LeftMouseButton up, and Mouse Move. Then we need to handle the actual zoom.
///
<summary>
/// Handles Left Mouse button down event
///
</summary>
///
<param name="sender"></param>
///
<param name="e"></param>
private
void LeftMouseButtonDownHandler(object sender, MouseEventArgs e)
{
//Indicate that the button is down
mouseButtonPressed = true;
//Reset Dragging
mouseIsDragging = false;
//Set Starting point of the drag if the user start dragging
dragOffset = e.GetPosition(this);
currentPosition = msi.ViewportOrigin;
}
In the left mouse button down even, we first set the indicator that the button is pressed. We then reset the dragging indicator, get the current position of the mouse, and finally get the current position of the MultiScaleImage.
///
<summary>
/// Handles Left Mouse button up event
///
</summary>
///
<param name="sender"></param>
///
<param name="e"></param>
private
void LeftMouseButtonUpHandler(object sender, MouseEventArgs e)
{
//Change flag to mouse button no longer pressed
mouseButtonPressed = false;
//If the user wasn't dragging then we do zooming
if(!mouseIsDragging)
{
//Check if shift was pressed. If so we zoom out, otherwise we zoom in
bool shiftDown = (Keyboard.Modifiers & ModifierKeys.Shift) == ModifierKeys.Shift;
ZoomFactor = 2.0;
if (shiftDown) ZoomFactor = 0.5;
Zoom(ZoomFactor, this.lastMousePos);
}
}
When the left mouse button is lifted we change the flag that indicates that the left mouse button is down and if the user was not dragging. We then check to see if shift was pressed. If shift was not pressed we zoom in by a factor of 2, but if shift was pressed we zoom out by a factor of .5. We then call our zoom function (which we have yet to create) with the zoom factor and the last point the mouse was at.
///
<summary>
/// Handlers the moving of the mouse
///
</summary>
///
<param name="sender"></param>
///
<param name="e"></param>
private
void MouseMoveHandler(object sender, MouseEventArgs e)
{
this.lastMousePos = e.GetPosition(this.msi);
}
With the mouse move function all we need to do is capture the position that the mouse is at. Finally in the below Zoom function that is called from the LeftMouseButtonUpHandler, we do the actual zooming.
public
void Zoom(double zoom, Point pointToZoom)
{
Point logicalPoint = this.msi.ElementToLogicalPoint(pointToZoom);
this.msi.ZoomAboutLogicalPoint(zoom, logicalPoint.X, logicalPoint.Y);
}
As you can see above we have to translate the mouse pointer relative to our MultiScaleImage and then we use the ZoomAboutLogicalPoint method to handle the zooming for us. The last thing we need to do is wire up the events to the MultiScaleImage control in the Page constructor which will look like the following:
public Page()
{
InitializeComponent();
//Wire up events
this.msi.MouseLeftButtonDown += LeftMouseButtonDownHandler;
this.msi.MouseLeftButtonUp += LeftMouseButtonUpHandler;
this.msi.MouseMove += MouseMoveHandler;
}
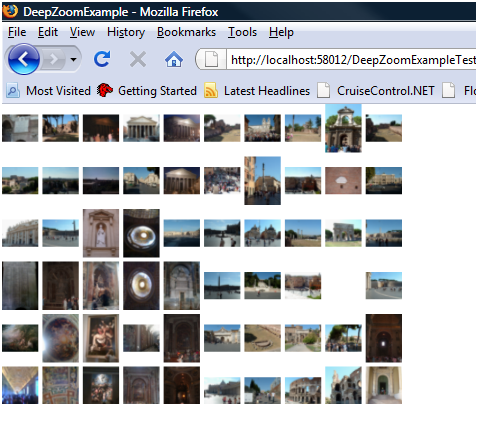
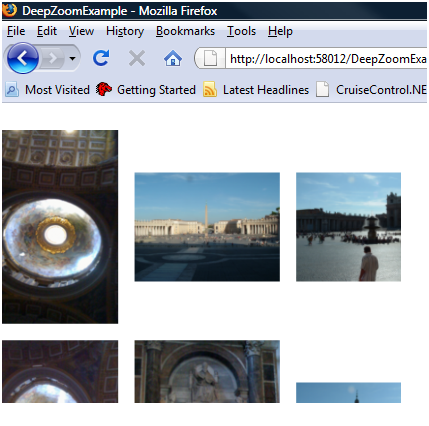
If you now run the application you will get the layout of all images on your screen as seen in the first picture below, and if I click on the picture of St. Peter's Square in the center of the image the MultiScaleImage control will zoom in on that particular image as seen in the second picture below. Holding down the shift key while clicking will zoom the MultiScaleImage back out.
In order to enable panning we need to augment a few functions that we have already created. Obviously we need to modify the MouseMoveHandler. Initially all this event was doing was updating the mouse position so that when we zoomed in or out we knew where the mouse was pointing. Now we are going to have it check to see if the mouse button is down to indicate that dragging is occurring. Also if the mouse is dragging we need to update the position so that the MultiScaleImage is centered on to where the mouse is dragging. Our new MouseMoveHandler appears below.
///
<summary>
/// Handlers the moving of the mouse
///
</summary>
///
<param name="sender"></param>
///
<param name="e"></param>
private
void MouseMoveHandler(object sender, MouseEventArgs e)
{
if(mouseButtonPressed)
mouseIsDragging = true;
this.lastMousePos = e.GetPosition(this.msi);
//Update this View of the MultiScaleImage is dragging
if(mouseIsDragging)
{
Point newOrigin = new
Point();
newOrigin.X = currentPosition.X -
(((e.GetPosition(msi).X - dragOffset.X)/msi.ActualWidth)*msi.ViewportWidth);
newOrigin.Y = currentPosition.Y -
(((e.GetPosition(msi).Y - dragOffset.Y)/msi.ActualWidth)*msi.ViewportWidth);
msi.ViewportOrigin = newOrigin;
}
}
In our left mouse button down handler we are already handling the dragging functionality by initializing the mouseIsDragging variable to false, and setting dargOffset to the initial point that the mouse was at when dragging was started. In the left mouse button up handler we need to update the dragging indicator that was set to true in the left mouse button down indicated. The new handler appears below:
///
<summary>
/// Handles Left Mouse button up event
///
</summary>
///
<param name="sender"></param>
///
<param name="e"></param>
private
void LeftMouseButtonUpHandler(object sender, MouseEventArgs e)
{
//Change flag to mouse button no longer pressed
mouseButtonPressed = false;
//If the user wasn't dragging then we do zooming
if(!mouseIsDragging)
{
//Check if shift was pressed. If so we zoom out, otherwise we zoom in
bool shiftDown = (Keyboard.Modifiers & ModifierKeys.Shift) == ModifierKeys.Shift;
ZoomFactor = 2.0;
if (shiftDown) ZoomFactor = 0.5;
Zoom(ZoomFactor, this.lastMousePos);
}
mouseIsDragging = false;
}
We now need to add one more handler. If the mouse goes outside the MultiScaleImage we what to stop the panning so we need to add a Mouse Leave event handler. In the handler I am also going to reset the mouse down variable when the user leaves the MultiScaleImage. This way if they leave the image, lift up the mouse button, and re-enter the image, it won't continue to pan.
///
<summary>
/// Handles the mouse leave event
///
</summary>
///
<param name="sender"></param>
///
<param name="e"></param>
private
void MouseLeaveHandler(object sender, MouseEventArgs e)
{
mouseIsDragging = false;
mouseButtonPressed = false;
}
We now need to assign the event, so in the constructor where we wired up the other events we need to also wire up the MouseLeave event of the MultiScaleImage:
public Page()
{
InitializeComponent();
//Wire up events
this.msi.MouseLeftButtonDown += LeftMouseButtonDownHandler;
this.msi.MouseLeftButtonUp += LeftMouseButtonUpHandler;
this.msi.MouseMove += MouseMoveHandler;
this.msi.MouseLeave += MouseLeaveHandler;
}
There you go. Adding panning was that easy. Now if you fire up the site you can click and dragging the image around and still zoom in and out using click and shit click.
The next thing we need to do is add zooming with the scroll wheel. We are going to do this by using the MouseWheelHelper class provided by Peter Blois. So grab this class and add it to your Silverlight Application. With Silverlight 2.0 the silverlight application can reach into the DOM using the Sliverlight DOM bridge and listen to events in the class, abstracting that away from us.
The first thing we need to do is create an event to handle the mouse wheel. Inside this event we set the event to handled so that the system knows that the event has be taken care of, we set the zoom factor by checking the Delta value that is passed to us from the MouseWheelHelper class. Finally we call the Zoom method passing the factor that we want to zoom by and the point we are zooming at, just like if the user had clicked the mouse button to zoom.
///
<summary>
/// Handles the mouse wheel events
///
</summary>
///
<param name="sender"></param>
///
<param name="e"></param>
private
void MouseWheelHandler(object sender, MouseWheelEventArgs e)
{
//Notify that we handled the event
e.Handled = true;
ZoomFactor = e.Delta > 0 ? 1.2 : .80;
Zoom(ZoomFactor, this.lastMousePos);
}
Lastly we wire up with event in our constructor just below where we we wiring up the rest of the events. The newly modify constructor appears as follows:
public Page()
{
InitializeComponent();
//Wire up events
this.msi.MouseLeftButtonDown += LeftMouseButtonDownHandler;
this.msi.MouseLeftButtonUp += LeftMouseButtonUpHandler;
this.msi.MouseMove += MouseMoveHandler;
this.msi.MouseLeave += MouseLeaveHandler;
new
MouseWheelHelper(this).Moved += MouseWheelHandler;
}
If you now build and run the application you'll see that the ability to have zoom with the scroll wheel of the mouse is now present. Hopefully this has demonstrated that working with the Deep Zoom functionality and Deem Zoom Composer is fairly simple and can greatly enhance the user experience for a web site. The even better news is that Deep Zoom composer will now generate all this functionality for you wrapped into a Silverlight 2.0 application when you export your Deep Zoom image. This particular sample was pieced together from what I learned from Kirupa Chinnathambi blog who is currently a member of the Expression Blend team at Microsoft.