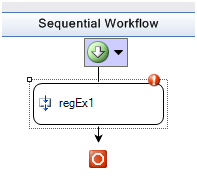
So far I have went over how to create a basic workflow activity that evaluates a regular expression against a string and I have also covered creating the validation class for the activity. The next thing I want to cover are some basics to enhancing the designer experience of the workflow activity allowing you to override the default visual display in the designer for a custom activity. Based on the default designer class our RegEx activity appears as follows:
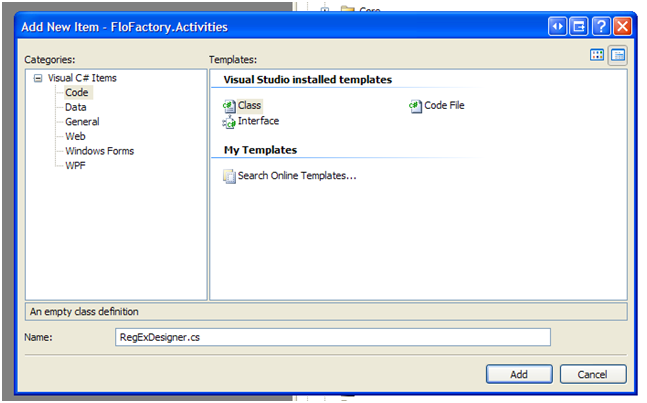
The first thing that needs to be done is to add a new class to the project called RegExDesigner.cs.
Next we need to make our new class inherit from the ActivityDesigner class. To do this we will also need to import the namespace System.Workflow.ComponentModel.Design, which means your code should now appear as follows:
using System.Workflow.ComponentModel.Design;
namespace FloFactory.Activities.Util.Logic
{
public
class
RegExDesigner : ActivityDesigner
{
}
}
There are a lot of functions that you can override, but the main function that we are going to work with is the Initialize function which will allow us to override the appearance of our activity in the designer. This first thing that I am going to do is add a nice image to the activity. Assuming you already have an image that you want to use as a resource in your project you add the image to the activity's design view by doing the following:
protected
override
void Initialize(System.Workflow.ComponentModel.Activity activity)
{
base.Initialize(activity);
Bitmap WorkFlowImage = Properties.Resources.workflow;
Image = WorkFlowImage;
}
The other thing I would like to do is change the text that appears in the activity. This will be the default text that shows up until the user of our activity sets the name property. This is easily done by setting the Text property in the Initialize function. After doing this the code should appear as follows:
protected
override
void Initialize(System.Workflow.ComponentModel.Activity activity)
{
base.Initialize(activity);
Bitmap WorkFlowImage = Properties.Resources.workflow;
Image = WorkFlowImage;
//Set the Text That appears
Text = "FloFactory RegEx";
}
Now we need to associate the designer class with our activity. We do this by going to the top of the RegEx.cs class and add the following attribute:
[Designer(typeof(RegExDesigner), typeof(IDesigner))]
public
partial
class
RegEx: BaseActivity
{
…
}
After adding this code to the Initialize function and adding the attribute if we now look at the RegEx activity we will see that our image has replaced the default image that appeared when the original designer class was applied to the RegEx activity. Also, the default text that was defined appears in the center of the activity.
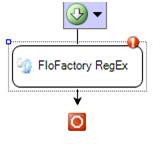
As you can see we have easily modified the image and the text that appears in the designer for our RegEx activity. In a future post I will cover modifying the appearance of the activity by changing its size and colors so as to create a more custom look and feel for the activity.